Some features may not be available to you at this time. Please contact us for questions or issues.
Table of Contents
- To Start
- Create New Documents
- EasySign Template Configurations
- Edit Existing Templates
- Archive EasySign Templates
To Start
To get started creating your EasySign Templates, sign into the Talentcare Platform.
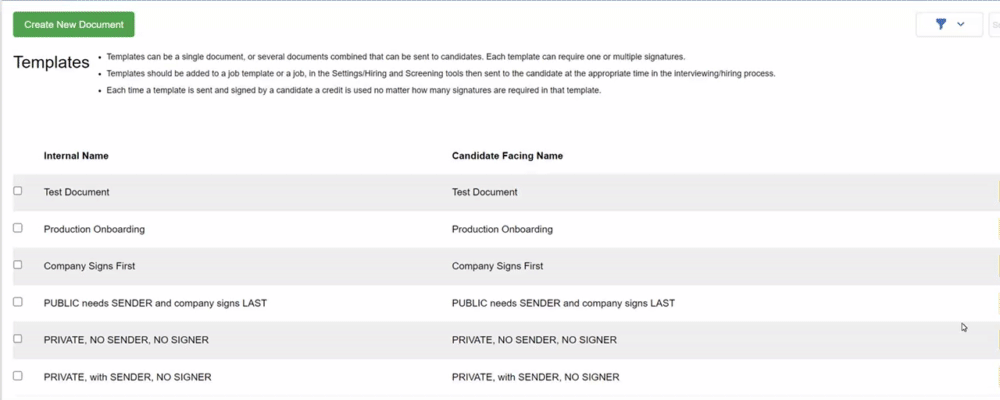
- From the Snapshot, click the Jobs tab, then EasySign Templates, and EasySign Templates again
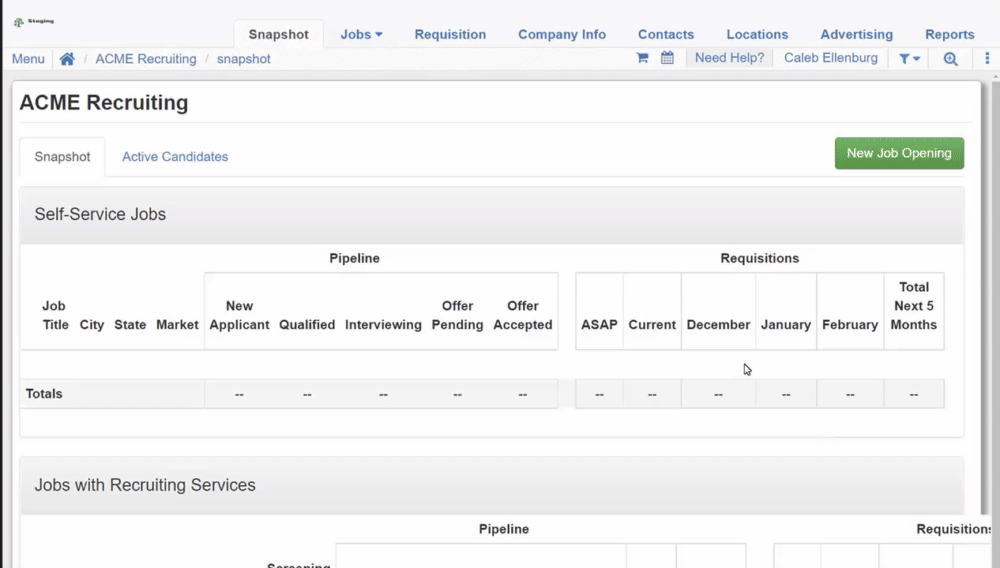
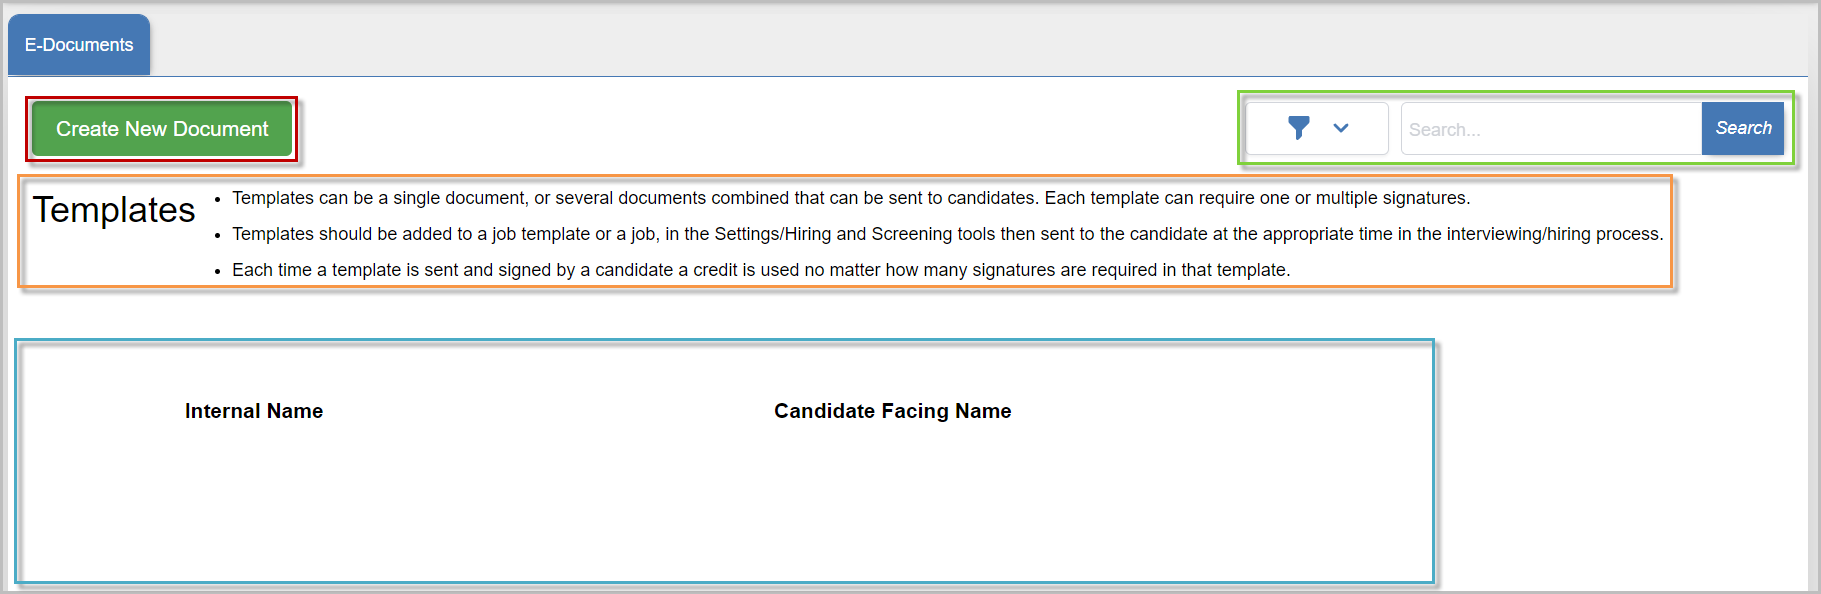
- On the EasySign Templates page, you will find the Create New Document button, information about the templates, and Search and Filter options for existing templates
- If you have any existing templates, they will appear at the bottom of the page
Create New Documents
- Start by clicking the Create New Document button
- In the pop-up window, fill in all applicable information

| Is this document private? | Set whether the document is private |
| Is this document an Offer Letter? | Set whether the document is an Offer Letter. This is a tag for future functionality! |
| Internal Name | The internal name that references the template in the Talentcare Platform |
| Candidate Facing Name | The name of the document that the candidate will see |
| Candidate Instruction | Directions for the candidate to follow for completing the document |
| Process Presentation | Depending on the type of template, select whether the document will be presented during application/screening stages, or the onboarding process |
- Upload the document that you will be sending to the candidate. Learn more about Uploading Files below
- Check the boxes by the questions near the bottom of the pop-up window to set parameters related to signing the document and notifying hiring managers
- Does the Sender need to fill in details before document is signed? - Check whether a Send needs to prepare the document prior to signing. This cannot be changed later
- Does this document need to be signed by a company representative? - Check whether the document will be signed by a company representative. This cannot be changed later
- Does this document need to be signed by the candidate first? - Determine whether the candidate will sign the document before the company representative. This cannot be changed later
- Should the hiring manager be notified when the candidate signs? - Check whether the hiring manager will be notified
- Should the primary recruiter be notified when the candidate signs? - Check whether the primary recruiter will be notified
- Use the text box at the bottom of the pop-up window to include the email addresses for anyone else that needs to receive notification when candidates sign this document
- When finished, click Save
Private vs Non-Private Documents
- Documents should be marked as private only if the document will contain private or confidential data
- Private documents can only be presented during Onboarding
- If a document is private, a Sender and must be assigned in the job settings
- Non-private documents are not public, but should not contain any private data on the candidate
- If a job is non-private, anyone with access to the job can be a Sender
A private document can only be viewed after the document is completed by the Signer, Sender, and Candidate!
Senders, Signers, and Viewers
- The Sender is able to prepare a document to be sent without the need to be a Signer of the document
- The Signer must sign the document, and can prepare documents, or will receive notification to sign a document that was prepared by a Sender
- A Viewer can view Documents, but has no permission to prepare, send, or sign the document
Uploading Files
If you uploaded a file when creating a new Template, once you click Save, you will see the document editor window.
- In the document editor window, you have the ability to customize and modify your document to include signature boxes, date and timestamps, check boxes, and more
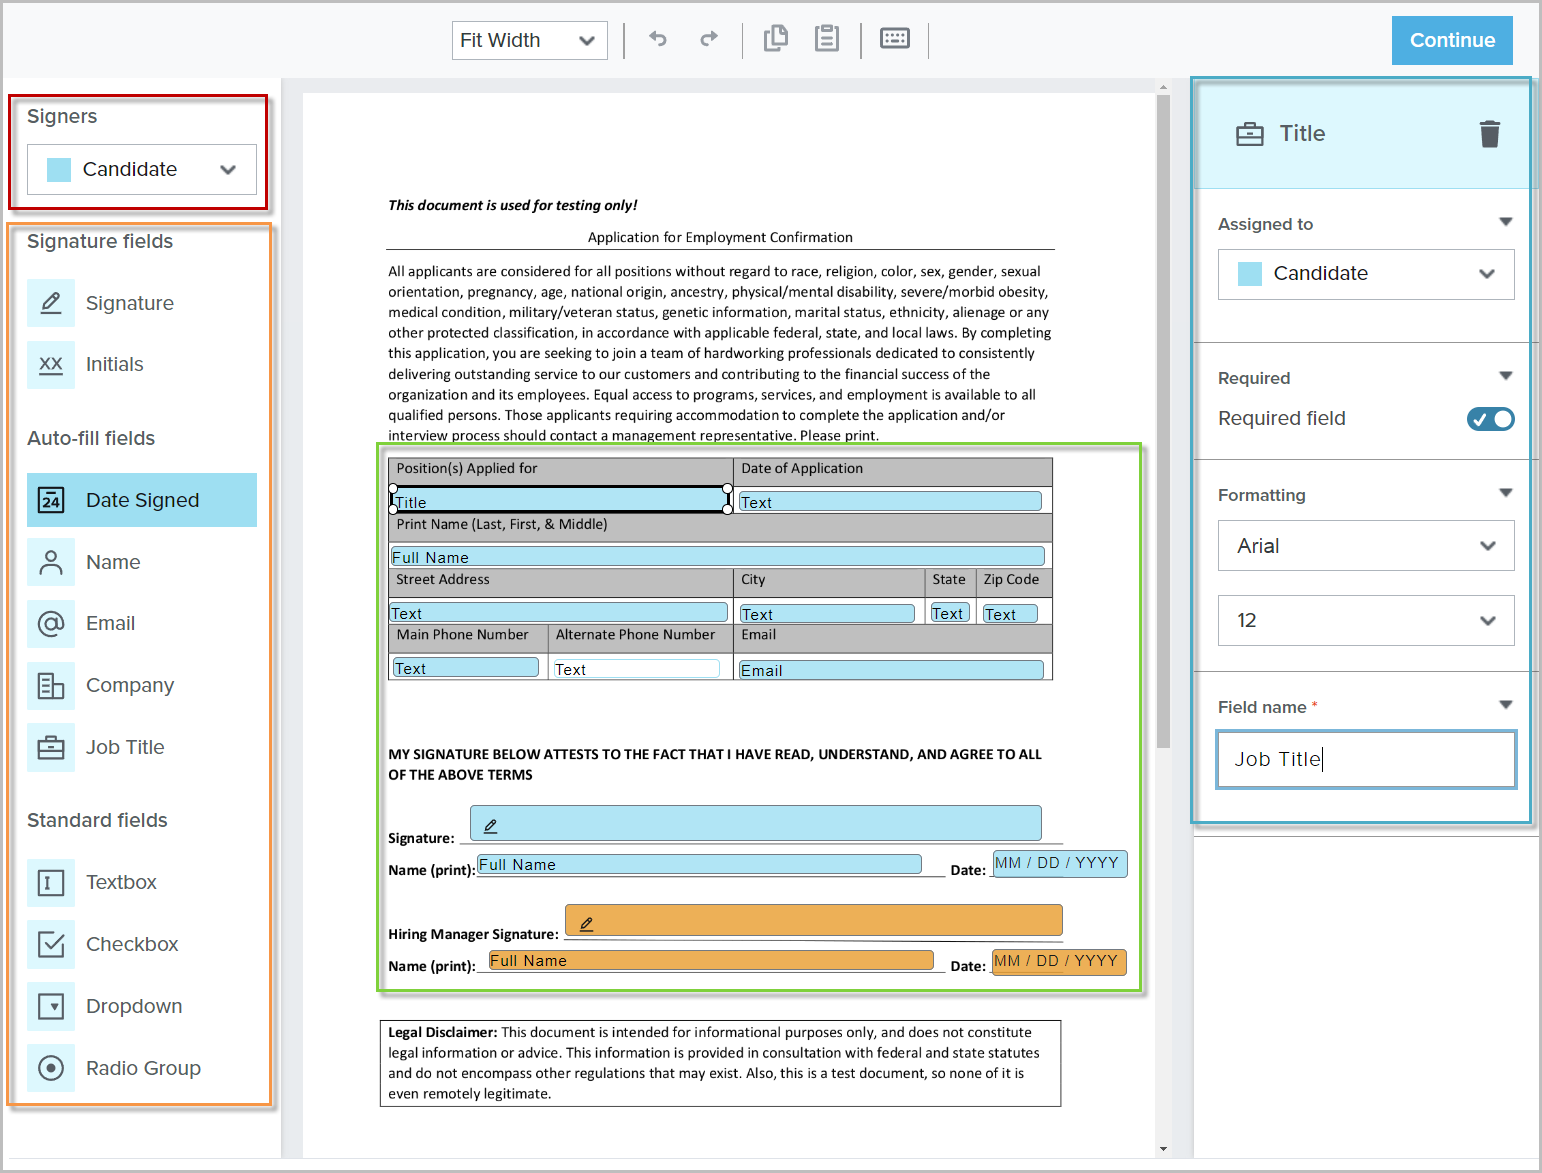
- In the top-left, select the Signer
- Blue represents fields for the candidate
- Orange represents fields for the company
- Use the Signature Fields, Auto-fill Fields, and Standard Fields to add text and signature boxes to your document
- Signature Fields provide signature and initial boxes
- Auto-fill Fields provide automatically filled information, such as date, job title, company, etc.
- Standard Fields provide options for answering questions, such as textboxes, checkboxes, dropdowns, and radio buttons
- When you choose a field to add to your document, click and drag it to the preview of your uploaded document
Double-click the document to duplicate the previously used field!
- With a field selected, use the options on the right side of the document editor window to customize options for the individual field
- When finished editing, click Continue to finish creating the template
EasySign Template Configurations
These are all of the possible configurations available when creating EasySign templates.
| Private or Non-Private | Sender? | Company Signs | Additional Notes |
| Non-Private | Need Sender | Last | |
| Non-Private | Need Sender | First | |
| Non-Private | Need Sender | Does not sign | |
| Non-Private | No Sender | Last | Can be sent automatically |
| Non-Private | No Sender | First | Can be sent automatically |
| Non-Private | No Sender | Does not sign | Can be sent automatically |
| Private | Sender Assigned | Last | Assigned sender must prepare document prior to sending |
| Private | Sender Assigned | First | Assigned sender must prepare document prior to sending |
| Private | Sender Assigned | Does not sign | Assigned sender must prepare document prior to sending |
| Private | No Sender Assigned | Last | |
| Private | No Sender Assigned | First | |
| Private | No Sender Assigned | Does no sign |
Edit Existing Templates
Follow these steps to make changes to an existing templates or permissions
- Proceed to the EasySign Templates page and locate the list of available templates
- Locate the template you'd like to modify. If you're making changes to the template, continue to the next step. If you're changing the permissions, proceed to Permissions below
Edit Template
- Click the Edit button
- In the pop-up window, make the necessary changes
You cannot make changes to the Internal Name!
- To edit the document template, click Edit Template
- When finished, click Update Fields
Permissions
- Click the Permission button
- In the pop-up window, you can edit which locations/brands will have access to the template
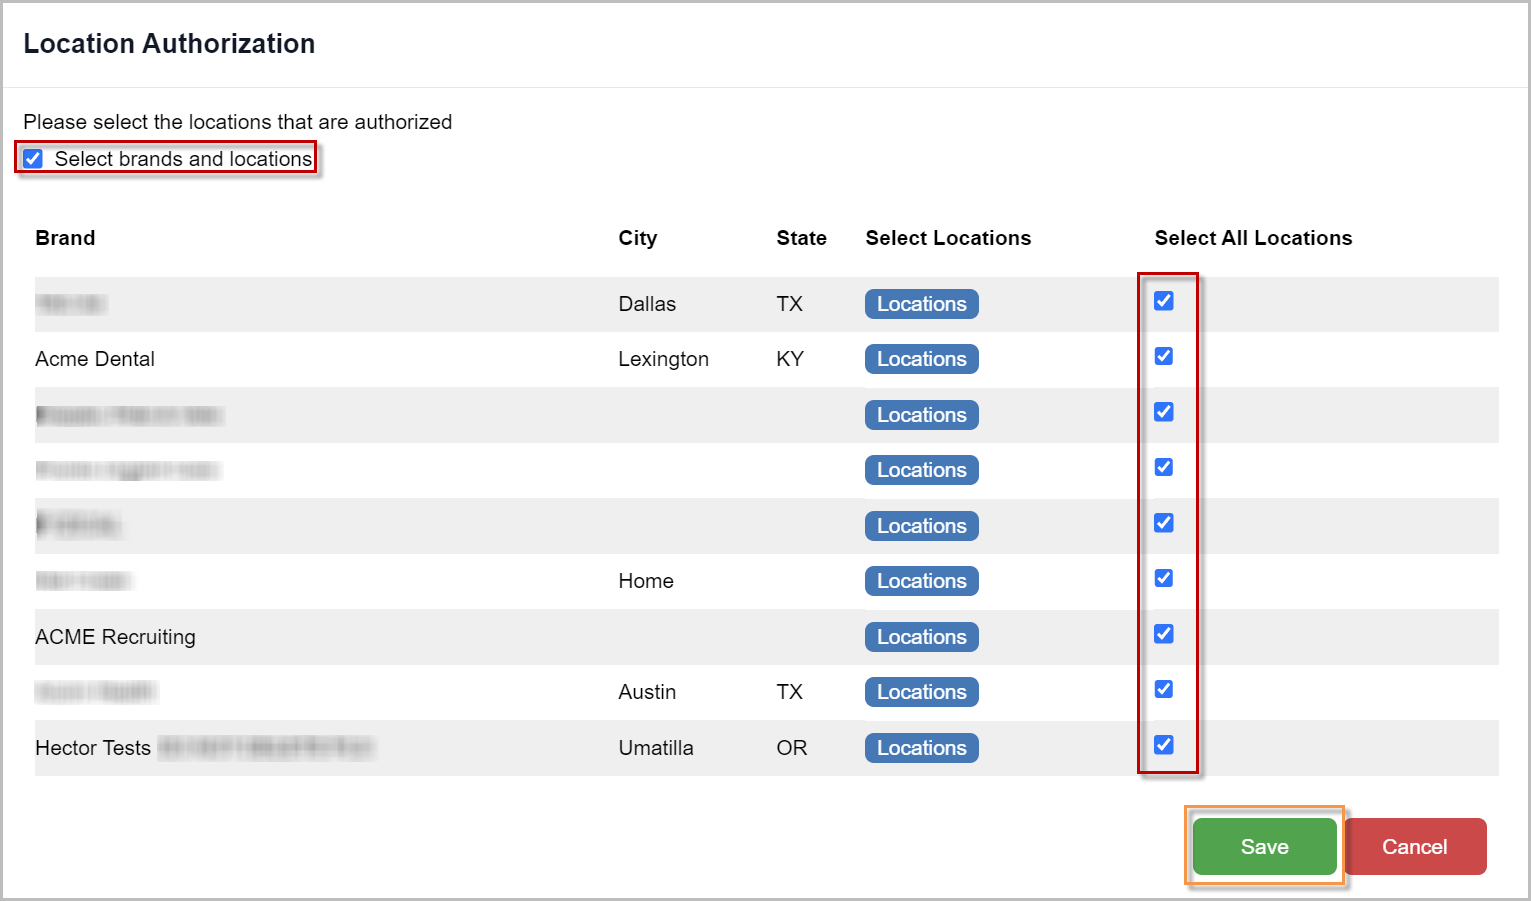
- Use the checkbox at the top to select/deselect all, or use the individual checkboxes to select/deselect by location/brand
- Once you've made your selections, click Save to save the permissions changes
Now that you have created your templates, it's time to put them to use. Learn how to add your documents to jobs and job templates here: Add EasySign Documents to Jobs
Archive EasySign Templates
In the event that a template needs to be removed from use, you can choose to archive the template. Situations in which a template may need to be archived include:
-
- A template is no longer needed
- A new version of a template has been created
- A template was created by accident
Archiving EasySign templates removes them from all open jobs and job templates.
- From the EasySign Templates page, select the template you'd like to archive
- Once selected, click Archive Selected Document

- In the pop-up window, click Archive or Replace
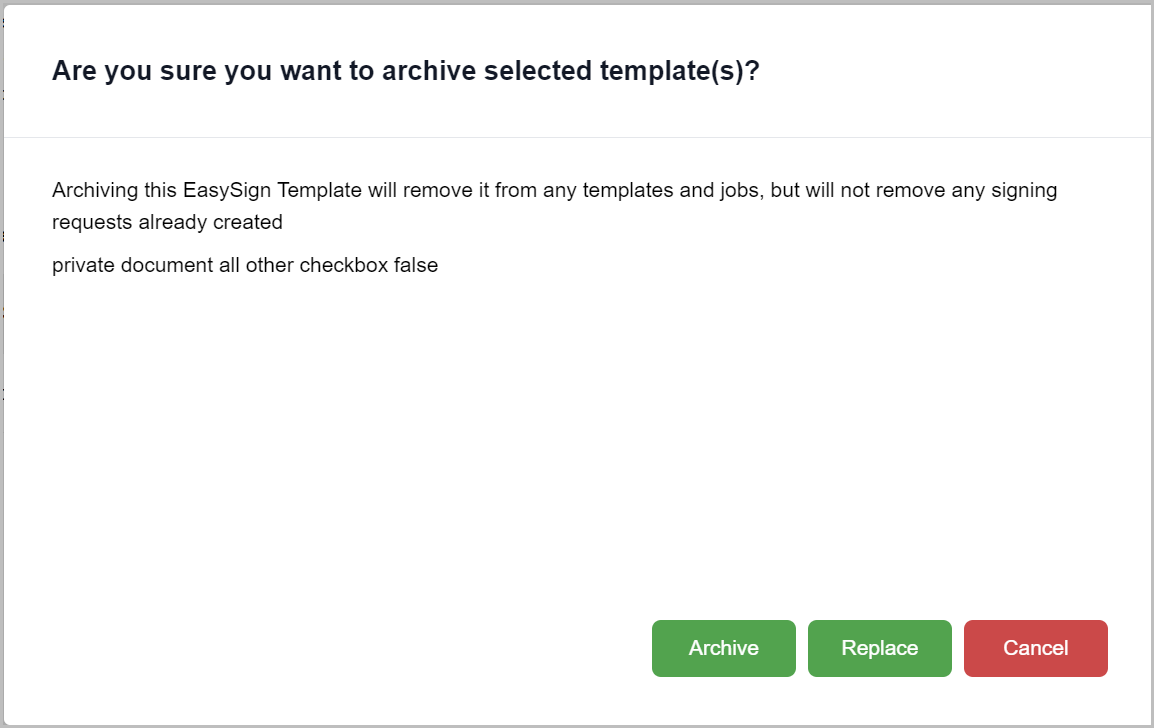
Replace Archived EasySign Templates
When archiving templates that will be replaced with new versions, follow the steps below.
Before archiving a template, make sure that the replacement template is created first!
- In the archive documents pop-up window, click Replace
- Select the new template that will replace the archived template
- Click Save
Recover Archived EasySign Templates
Should an archived template need to be recovered, follow the steps below.
- From the EasySign Templates page, click the Filter button and select Inactive Templates
- Select the archived template, and click Reactivate Selected Document
- Click Restore
- If you do not see the restored template in the list, refresh your web browser page
For questions, comments, or issues, please contact us!