Some features may not be available to you at this time. Please contact us for questions or issues.
Job vs Job Templates
To add an EasySign document to your job template, you will need to view and edit your job configurations.
Learn how to edit your job templates here: Edit Job Templates
Adding EasySign documents requires editing the job template settings. Learn more here: Edit Job Templates - Settings Tab
Once you've determined whether the EasySign document will be added to a job or job template, the process for adding the documents is the same.
Add EasySign Documents
This process does not apply to EasySign Offer Letters. Learn more about adding EasySign Offer Letters to jobs and job templates here: Add EasySign Offer Letters to Jobs
- Click the Add button at the top of the Screening and Hiring Tools tab
- In the pop-up window, select the EasySign template you'd like to add
- Click Save
- EasySign documents are found in either Checklist Page or Onboarding sections
The part of the process selected when creating the EasySign document determines the section the document is added to in Screening and Hiring Tools!
Invite/Auto
- You can set the EasySign document to be automatically sent to the candidate, depending on the conditions for auto-send. These conditions are outlined in the description for each section

- If the document is set for manual send, the document can be sent to a candidate at any time
Only non-private EasySign documents with no Sender can be set to auto! Learn more here: Manage EasySign Templates
Actions
- Edit or Remove the document by clicking the appropriate button
Signer
When adding an EasySign document to a job, you can choose the signer for the document. However, when adding to a job template, this is not possible.
- To add a signer to an EasySign document added to a job template, proceed to the appropriate job and Edit the document, and select the signer

Company Signs First
If your EasySign template elects to have someone from your company sign the document before the candidate, there are certain rules regarding notifications and candidate status updates.
Notification
Once a candidate reaches the appropriate status in the recruiting process that would send a document, any Hiring Authority and other collaborators on the document will receive notification that the document needs to be signed.
- Looking at the Candidate Process page will provide a status for the document
- If you are not a signer, you will see a Pending Signature status button
- If you are the signer, you will see a Initiate status button

Signing and Sending the EasySign Document
- Click Initiate to begin signing the document
- In the pop-up window, complete all company fields, including signature

- Once the signature is complete, click Continue and complete the signing process
- The status button will now be changed to Send
- Click Send to have the document sent to the Candidate Portal
Once signed, anyone with the ability to send the document can click the Send status button, not just the signer!
- The status button should now say Requested

- Once the candidate signs the document, you will be able to View the document

Notification Settings
Notifications for EasySign documents can be added to the Daily Summary to alleviate the amount of notifications that may come in for documents.
- Head to your Account Settings page to edit your Notification Settings
Learn more about Account and Notification settings here: Manage your Account Settings
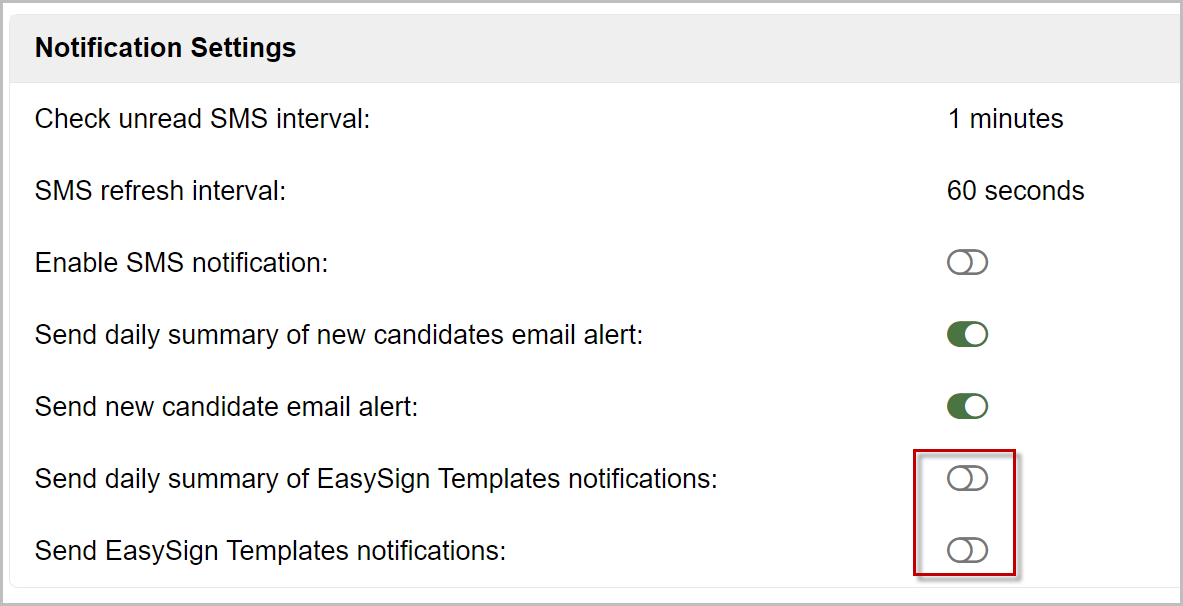
- Click the toggle button to enable Send EasySign Templates notifications
- Click the toggle button to enable Send daily summary of EasySign Templates notifications
For questions, comments, or issues, please contact us!